

Editing the gradient
Before we edit the gradient, go to the Outside tab of the
Layer Properties tool window.
Editing gradients
G
Change the Color Density setting to 1 and the
Transfer Function setting to Linear.
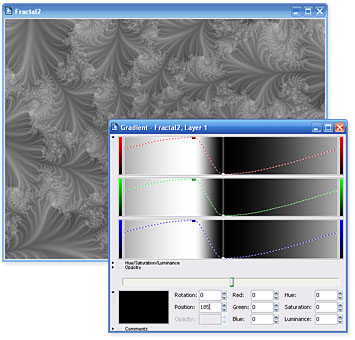
Now, looking again at the gradient editor, you will notice that there are only two sets of control
points. Those in the left most set are all at the bottom of their respective color panels creating
black, while those in the middle of the gradient editor are at the top of their panels creating white.
G
Let s move the control points around until we increase the contrast between the white and
black areas. As you drag the control points, be sure to keep them pulled all the way down
(for black) or all the way up (for white) in their color panels to prevent introducing color into
the gradient.
After you have experimented with moving the control points, let s synchronize their positions.
G
A nice contrast can be found with the set of white control points at Position setting 130 and
the black control points at Position setting 185. You may either drag the points to these
locations, or click on the respective points and type their positions into the Position setting.
Your image and gradient should now look like this:
37
footer
Our partners:
PHP: Hypertext Preprocessor Cheap Web Hosting
JSP Web Hosting
Ontario Web Hosting
Jsp Web Hosting
Cheapest Web Hosting
Java Hosting
Cheapest Hosting
Visionwebhosting.net Business web hosting division of Vision Web Hosting Inc.. All rights reserved