Reference [Track Editing]
The indication Move SURE? appears on the display.
5.
Press the [ENTER] key.
The indication Erase SURE? appears on the display.
8.
To execute the move operation, press the [ENTER]
key.
6.
To execute the erase operation, press the [ENTER]
By using the [EXIT] key instead of the [ENTER] key, you
key.
can move back to previous screens.
By using the [EXIT] key instead of the [ENTER] key, you
When the move is executed, the indication Move
can move back to previous screens.
COMPLETE appears on the display, and the unit returns to
When the erase is executed, the indication Erase
the track edit menu.
COMPLETE appears on the display, and the unit returns to
the track edit menu.
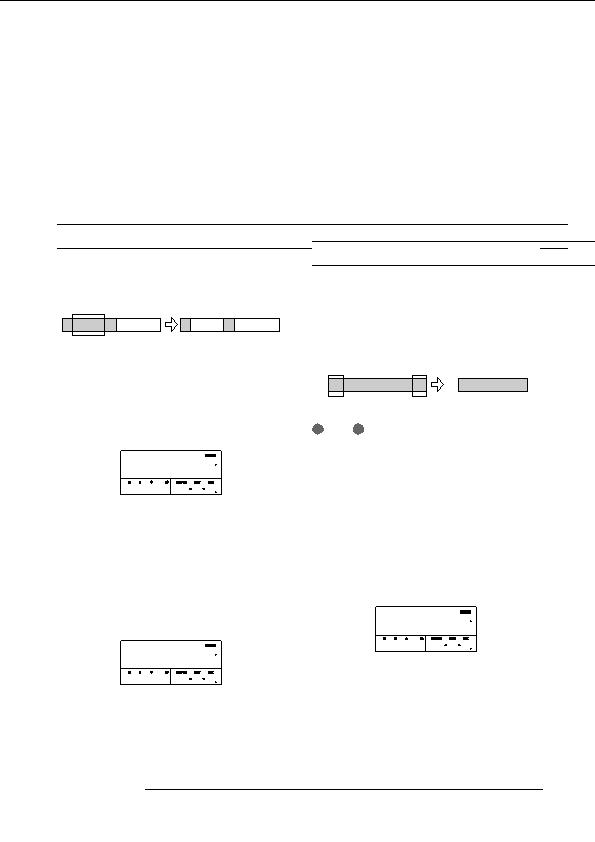
Erasing a specified range of data
Trimming a specified range of data
You can erase the audio data of a specified range and return
the range to the mute (non recorded) condition.
You can erase the audio data of a specified range and adjust
the data start/end point (trimming). For example, when
Erase
preparing to burn the master track onto a CD R/RW disc,
you might want to remove unwanted portions at the start and
the end of the V take that will be used.
1.
Refer to steps 1 6 of Basic editing steps to
Erase
Erase
select the track/V take for erasing, and press the
[ENTER] key.
The display changes as follows. This screen lets you specify
the erase range start point.
N
OTE
When data before a specified section are erased (trimmed),
the remaining audio data will move up by that amount.
Ers Src
Ers Src
00
Therefore the timing may become mismatched with regard to
START
START
other tracks/V takes.
0 0 0 0 001 1 0
1.
Refer to steps 1 6 of Basic editing steps to
2.
Use the cursor left/right keys to move the flashing
select the track/V take for trimming, and press the
section of the counter, and turn the dial to specify
[ENTER] key.
the erase start point.
The display changes as follows. This screen lets you specify
You can also specify the point as a mark.
the start point for the range to be preserved after trimming
(all data before this point will be erased).
3.
Press the [ENTER] key.
The display changes to Ers Src END .
Trim Src
Trim Src
00
START
START
Ers Src
Ers Src
0 0 0 0 001 1 0
00
END
END
0 132 0 042 1 24
2.
Use the cursor left/right keys to move the flashing
section of the counter, and turn the dial to specify
4.
Use the same procedure as in step 2 to specify the
the range start point.
erase range end point.
You can also specify the point as a mark.
If you press the PLAY [
R
] key at this point, the specified
3.
range will be played.
Press the [ENTER] key.
ZOOM MRS 802
49
footer
Our partners:
PHP: Hypertext Preprocessor Cheap Web Hosting
JSP Web Hosting
Ontario Web Hosting
Jsp Web Hosting
Cheapest Web Hosting
Java Hosting
Cheapest Hosting
Visionwebhosting.net Business web hosting division of Vision Web Hosting Inc.. All rights reserved