
Seismology Instruction with the AS 1
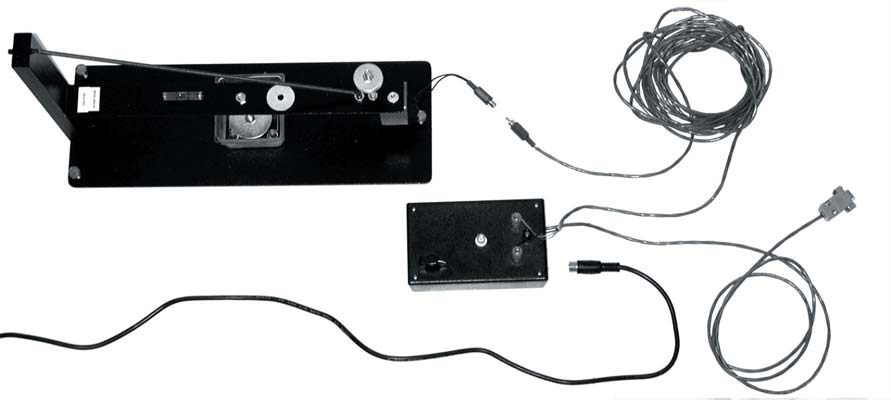
12. There are 2 cables leaving the interface box
(Figure 10). The paired shielded coaxial cable
(attached to the interface box in Step 10) has a
plug connector on the end. The other cable has
a gray 9 pin connector. Install the 9 pin connec
tor from the interface box to the serial port on
your personal computer. If your serial card has
a 25 pin connector, you will need to purchase
a 9 to 25 pin adapter. If your computer does
not have a serial port, you can install the AS 1
through a USB port, a USB to serial adapter
is needed (both available from Radio Shack or
Figure 10
similar store).
13. Plug the connector end of the paired shielded coaxial cable attached to the
interface box to the matching connector on the seismometer base.
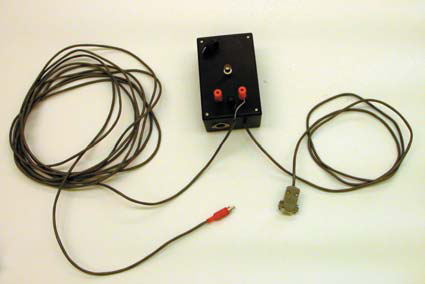
14. Plug in the 8 pin cable from the power supply box to the 8 pin slot on the interface box.
Note the orientation of the pins to avoid damaging the connectors. Plug in the power cord
from the power supply to a surge protector (Figure 11).
Figure 11
15. Cover the seismometer with the plexiglass display box. This will minimize motion of the
boom due to air currents and keep dust off the instrument and oil.
CAUTION: If you should decide to move the seismometer, disconnect the boom arm to
prevent damage to the knife edge and/or coil as a result of the boom arm swinging.
AmaSeis Version 1.0 Level 2005.05.19
2.4
footer
Our web partners:
Inexpensive
Web Hosting
Java Web Hosting
personal webspace
webspace php
linux webhost
html web templates
DreamweaverQuality Web Templates
PSD Web Templates
cheap webhost
j2ee web Hosting
buy webspace
ftp webspace
adult webspace
frontpage WebHosting
webspace hosting
cheap webhost
Visionwebhosting.net Business web hosting division of Vision Web Hosting Inc.. All rights reserved
earthlink web hosting